There are many third-party apps available for Mac that will convert images for you, but if you’re running macOS Monterey or later, you can convert an image or a selection of images directly within Finder using a new default Quick Action.
If you’re unfamiliar with them, Quick Actions help you perform certain tasks, such as creating a PDF or rotating an image, right from the Finder or your desktop, without opening an app.
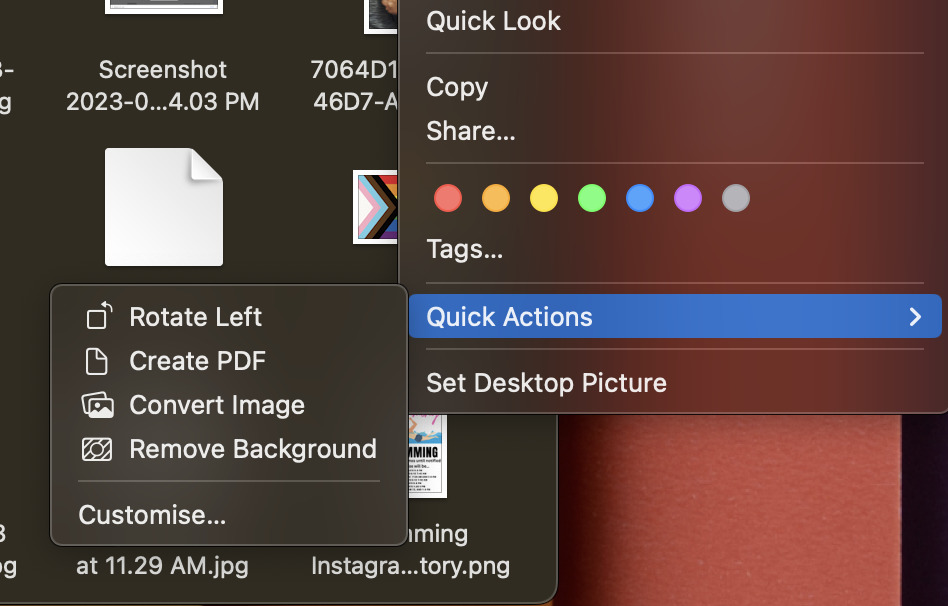
And in macOS Monterey, Convert Image is the latest pre-installed Quick Action in Finder that can quickly convert an image file from one format to another. It also lets you batch convert selections, change the file size, and choose whether to keep the file’s metadata in the converted image.
- To use the Convert Image Quick Action, right-click (or Ctrl-click) an image file or drag a selection box over several image files, then select Quick Actions -> Convert Image.
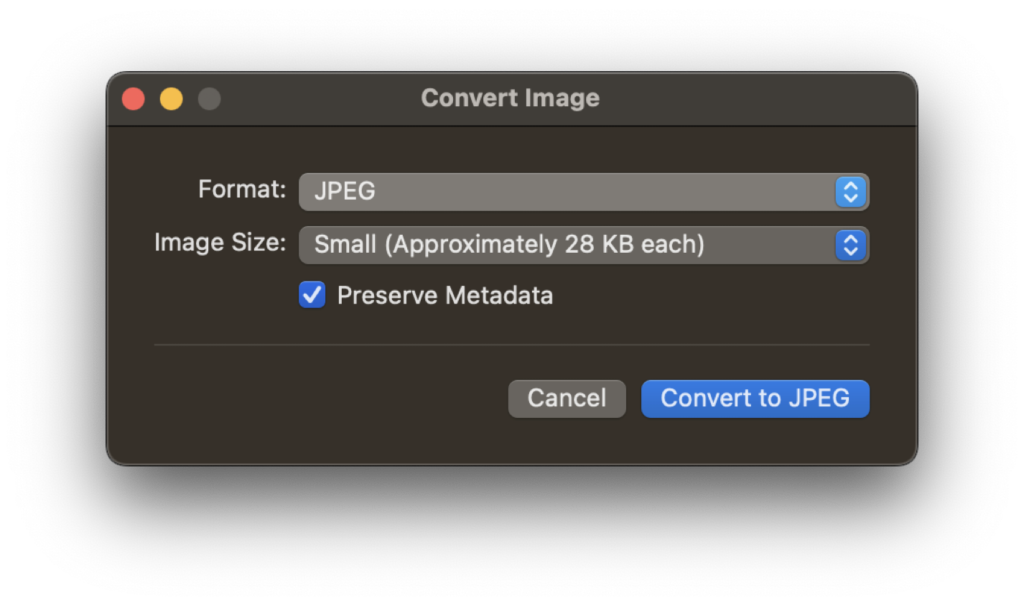
- 2. In the dialogue that appears, choose the desired format (JPEG, PNG, or HEIF) and the output file size (small, medium, large, or actual).
- 3. Check the box to preserve the original image’s metadata in the output image.
- 4. Click Convert to [Format].
The converted image will be saved in the same folder as the original image, which will remain intact. Note that you’ll also see the Quick Action available in the Finder preview pane when you’re viewing a folder of images.